| Doteasy Tutorials - Doteasy Hosted Blogs |
A blog is a communication and self-expression tool. It is the easiest way to build a professional online presence, and the Doteasy Hosted Blog allows you to add a blog to your website without the hassle of database or scripting requirements. It is free to use and it works on all our web hosting plans, including the $0 Hosting package; and you can easily customize it to match the look of your Doteasy Hosted Forum.
Create. Write. Publish. It's easy with Doteasy Hosted Blogs.
Let's Get Started!
Activate Forum - Create Blog Account
Signing In to your Doteasy Hosted Blog
Updating Your User Account Information
Changing Your Password
Setting Up Your User Profile
Customizing Your Blog
Page Settings and Layout
Header
Body
Sidebar
Footer
Customizing The Sidebar
Changing the Appearance
Enable/Disable Sidebar Elements
Edit Sidebar Elements
Re-arrange Sidebar Elements
Add a Custom Script
Categories
Creating a Category
Assign Multiple Categories to an Entry
Edit a Category
Re-arrange Categories
Deleting a Category
Links
Adding a New Link
Edit Links
Re-arrange Links
Posting Entries
Posting a New Entry
Adding an Image
Uploading a File - Hyperlinking
Uploading a File - Embed Object
Edit a Saved Draft
Edit a Published Entry
Delete a Published Entry
Blogging: Text, Photo, and Video
Text
Photo
Video
Entry Management - Settings Configuration
Display
"Email to Friend"
Date/Time Format
Comments
Enabling an Entry for Comment
Managing Comments
Deleting Comments
Spice It Up! (Blog Sidebar)
Add Doteasy Web Tools
Blogroll
Ads
Images and Photos
Widgets
Post a Video or Audio Clip
I. Activate Blog - Create Blog Account
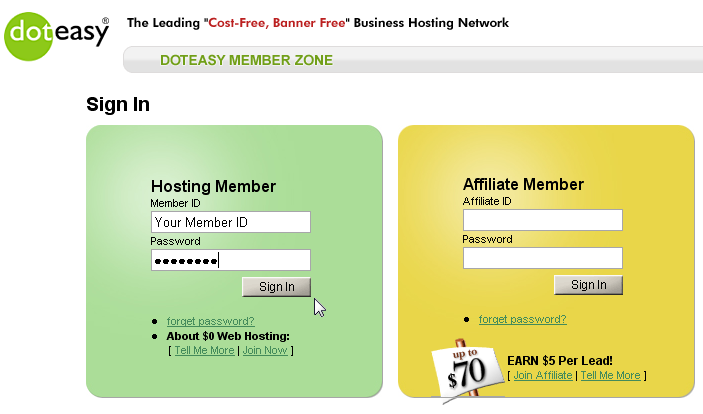
![]() Login to your Member Zone at https://member.doteasy.com.
Login to your Member Zone at https://member.doteasy.com.
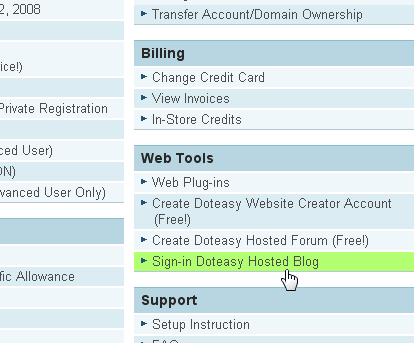
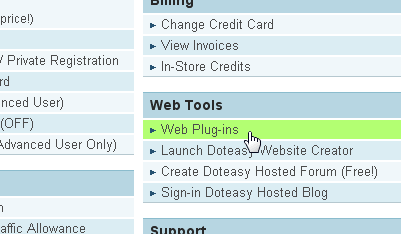
![]() Under the Web Tools section, select Create Doteasy Hosted Blog (Free!).
Under the Web Tools section, select Create Doteasy Hosted Blog (Free!).

![]() Complete the Create a Blog Account form.
Complete the Create a Blog Account form.
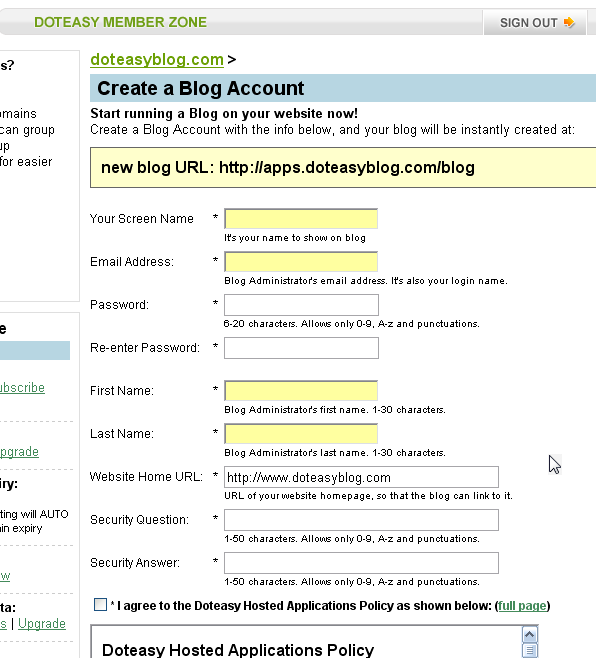
![]() Once you have completed the form, click on the Create Blog Account button. Your Blog Admin account will be created for you. You will be redirected to your blog URL. You can now begin setting up your blog.
Once you have completed the form, click on the Create Blog Account button. Your Blog Admin account will be created for you. You will be redirected to your blog URL. You can now begin setting up your blog.
II. Signing In to your Doteasy Hosted Blog
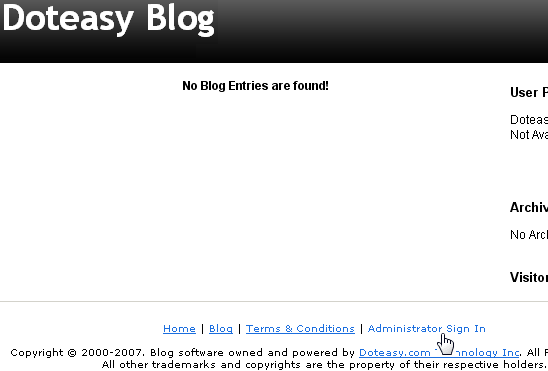
Once you have completed the Blog Account Creation step, you will be redirected to your new blog URL.
The Create Doteasy Hosted Blog link in your Member Zone will become Sign-in Doteasy Hosted Blog. You can sign in to your blog via this link.
Alternatively, you can use the Administrator Sign In link on the bottom of your blog page.
III. Updating your User Account Information
![]() After you have logged into your Doteasy Hosted Blog account, click on the User Information tab.
After you have logged into your Doteasy Hosted Blog account, click on the User Information tab.
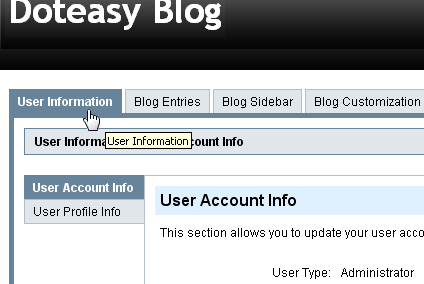
![]() Then, click on the User Account Info sub-tab.
Then, click on the User Account Info sub-tab.
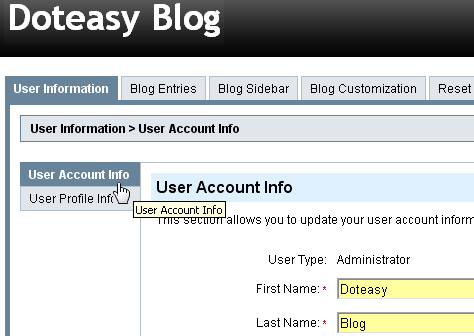
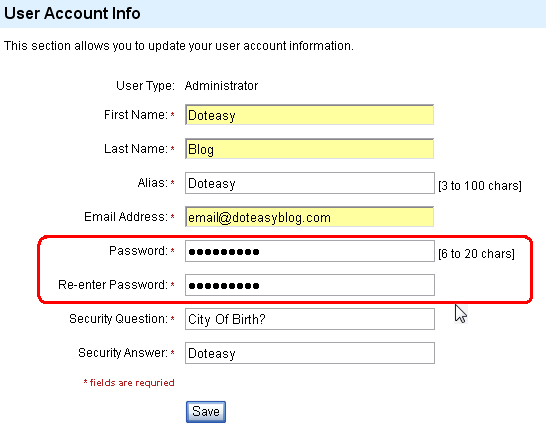
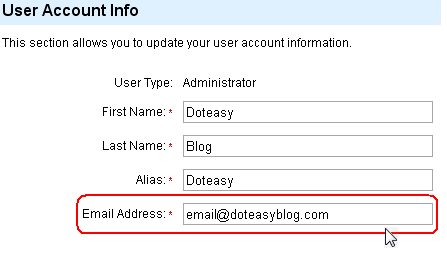
![]() This section allows you to update your blog account information, including your name, alias, email address, password, security question and answer.
This section allows you to update your blog account information, including your name, alias, email address, password, security question and answer.
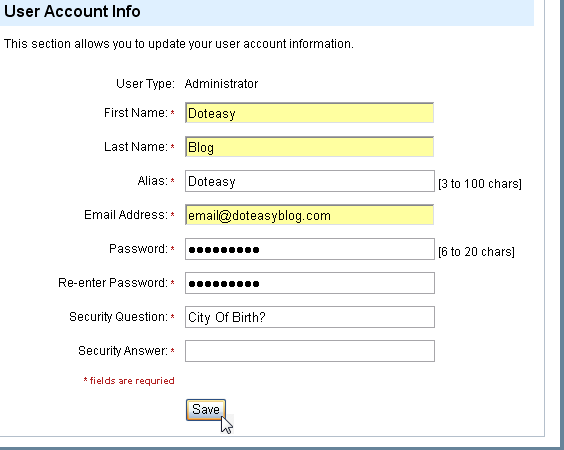
![]() Click on the Save button when you are ready.
Click on the Save button when you are ready.
IV. Changing Your Password
![]() Click on the User Information tab.
Click on the User Information tab.
![]() Then, click on the User Account Info sub-tab.
Then, click on the User Account Info sub-tab.
![]() Enter your new password into the Password field, and re-enter it into the Re-enter Password field.
Enter your new password into the Password field, and re-enter it into the Re-enter Password field.
![]() Click on the Save button when you are ready, and your new password will be saved and updated.
Click on the Save button when you are ready, and your new password will be saved and updated.
V. Setting Up Your User Profile
![]() Click on the User Information tab.
Click on the User Information tab.
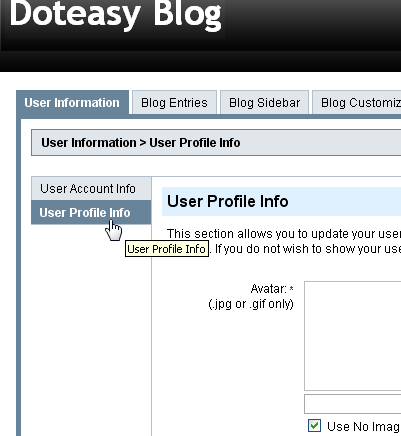
![]() Then, click on the User Profile Info sub-tab.
Then, click on the User Profile Info sub-tab.
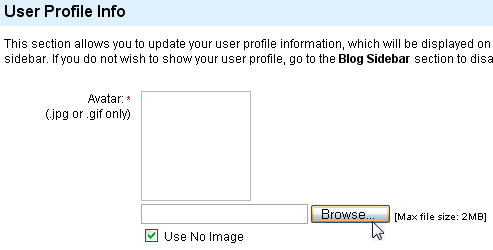
![]() This section allows you to update your user profile information.
This section allows you to update your user profile information.
Note:
- The information will be displayed on your blog’s sidebar, under User Profile.
- If you do not want to show your user profile on your blog, simply uncheck the "Display in Sidebar" option on the Sidebar Management page.
|
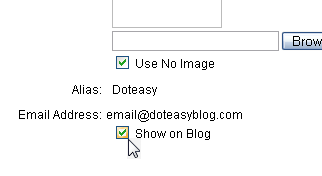
1. Avatar You can choose to use an avatar. Click on the Browse button to find the image file on your computer.
Note that the image file must be in .jpg or .gif format, and is limited to 2MB in file size. If you choose to use an avatar, make sure you uncheck the Use No Image box.
|
|
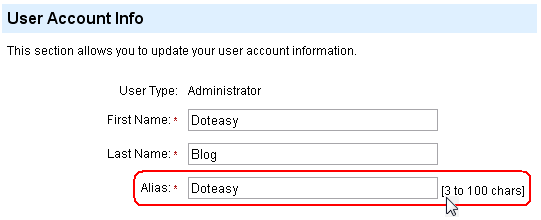
2. Alias If you want to change your alias, you will need to do so in the User Account Info sub-tab.
|
|
3. Email By default, your email address will not be shown on your blog. This is to protect your email address from spammers. If you wish to display your email address, make sure you check the Show on Blog box.
If you want to change your email address, you will need to do so in the User Account Info sub-tab.
|
|
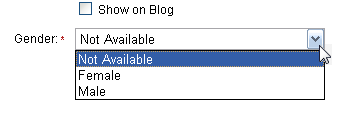
4. Gender Use the drop-down menu to choose your setting.
|
|
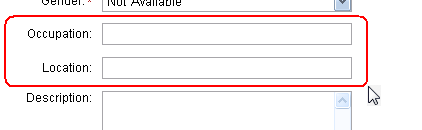
5. Occupation and Location Enter your location info, or leave the field blank if you do not wish to display this information on your blog.
|
|
6. Description Enter a description for your blog, or you can leave the field blank if you do not wish to display this information on your blog.
You can also use this section to display a greeting or "welcome" message for your visitors. |
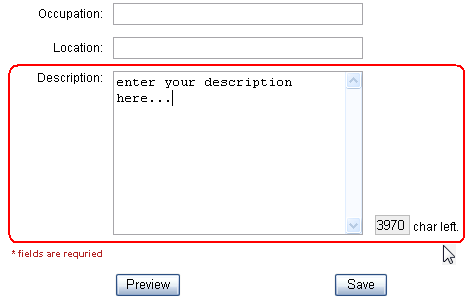
![]() Click on the Save button when you are ready.
Click on the Save button when you are ready.
VI. Customizing Your Blog Page Settings and Layout
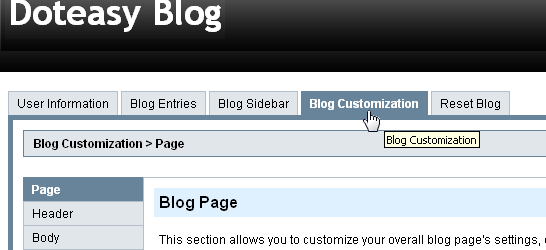
![]() Click on the Blog Customization tab.
Click on the Blog Customization tab.
![]() Click on the Page sub-tab.
Click on the Page sub-tab.
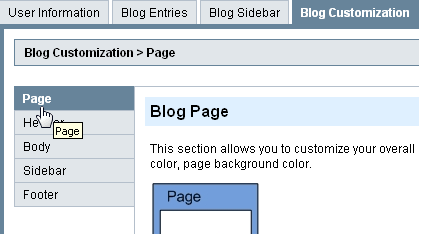
![]() This section allows you to customize the overall blog page's settings and layout.
This section allows you to customize the overall blog page's settings and layout.
Let's go through each setting together:
|
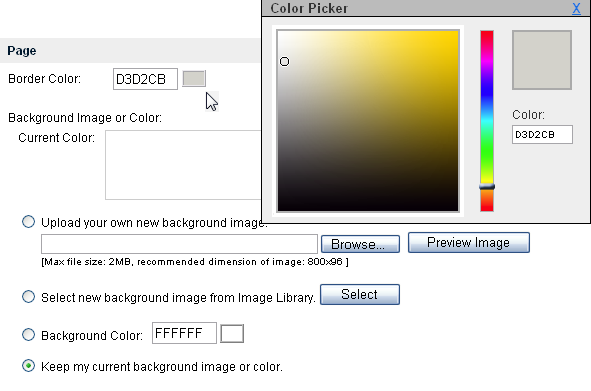
1. Page You can choose your page border color, background color and a background image. You can enter in the HEX code or you can use the Color Picker.
|
|
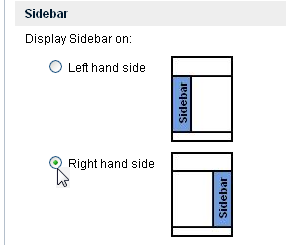
2. Sidebar You can choose to have your blog sidebar on the left side or the right side of the page.
|
|
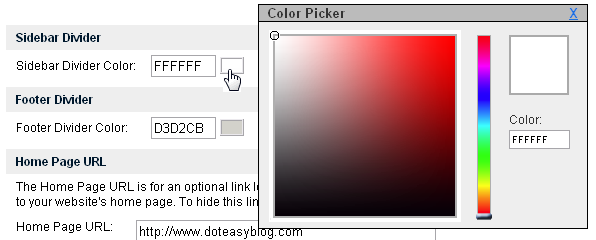
3. Sidebar Divider Choose the color of your sidebar divider. You can enter in the HEX code or you can use the Color Picker.
|
|
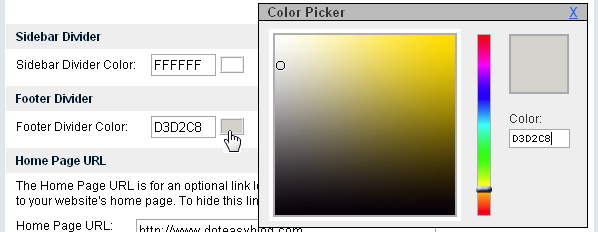
4. Footer Divider Choose the color of your footer divider. You can enter in the HEX code or you can use the Color Picker.
|
|
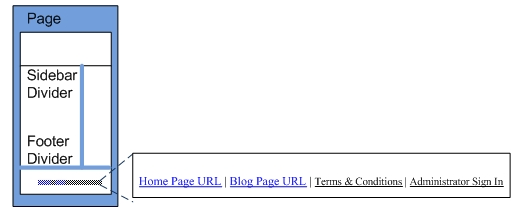
5. Home Page URL You can setup an additional link in the blog footer to link your blog to your website's home page. This is where the link is displayed on your blog page
If you do not need to setup the Home Page URL link, simply leave the input field blank. |
|
6. Blog Page URL The Blog Page URL is the link that goes to the main page of your blog. This is where the link is displayed on your blog page
The default title of your blog URL is "Blog". You can change this title as you wish. |
![]() Click on the Save button when you are ready.
Click on the Save button when you are ready.
VII. Customizing Your Blog Header
![]() Click on the Blog Customization tab.
Click on the Blog Customization tab.
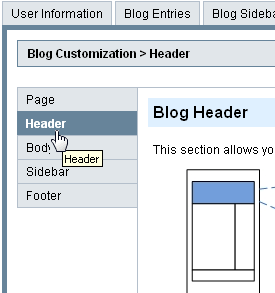
![]() Click on the Header sub-tab.
Click on the Header sub-tab.
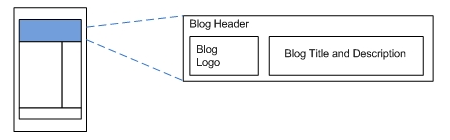
![]() This section allows you to customize the Header section of your blog.
This section allows you to customize the Header section of your blog.
Let's go through each setting together:
|
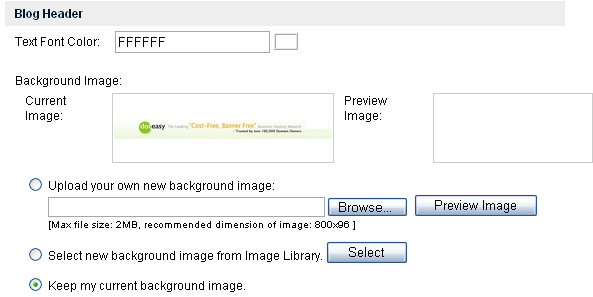
1. Blog Header Here, you can change the colour of blog header text and background. Note that the header is at a fixed height of 96px.
You also have the option to upload your own header background image or choose one from our Image Library. |
|
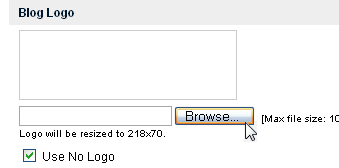
2. Blog Logo If you want to add a logo to your blog header, use the Browse button to locate the image file on your computer. Uncheck the Use No Logo box if you wish to add a logo image to your blog header.
Note that the maximum file size is 100KB, and the logo image will be resized to 218 x 70 upon publishing to your blog header. |
|
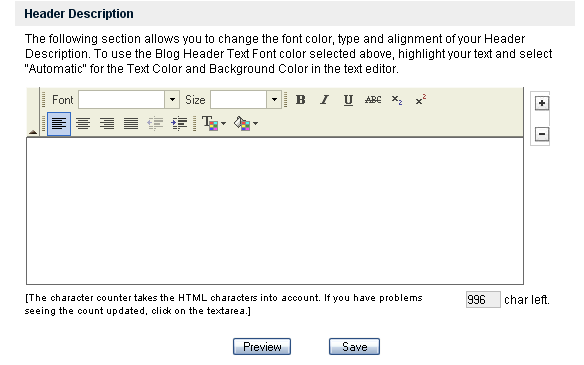
3. Header Description Enter your blog's header description.
|
![]() Click on the Save button when you are ready.
Click on the Save button when you are ready.
VIII. Customizing Your Blog Body
![]() Click on the Blog Customization tab.
Click on the Blog Customization tab.
![]() Click on the Body sub-tab.
Click on the Body sub-tab.
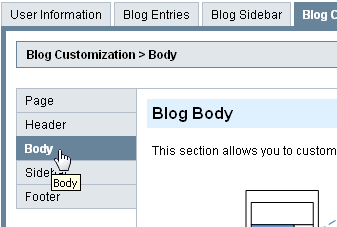
![]() This section allows you to customize the Body section of your blog.
This section allows you to customize the Body section of your blog.
Let's go through each setting together:
|
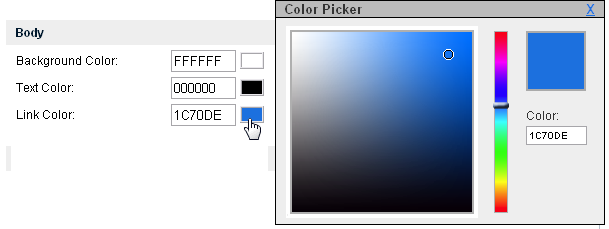
1. Blog Body Here, you can change the color of your blog's body background, text and links. You can enter in the color HEX code, or you can use the Color Picker.
|
|
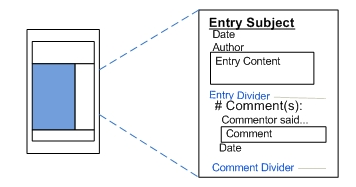
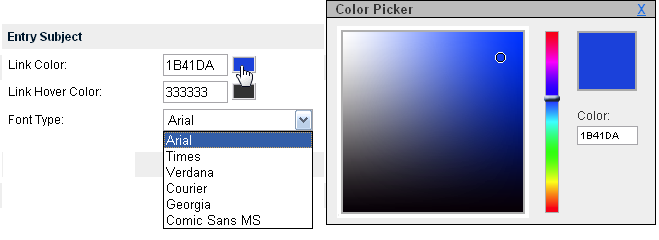
2. Entry Subjet Here, you can change the appearance of your entry's subject line, including the font type, size and color.
|
|
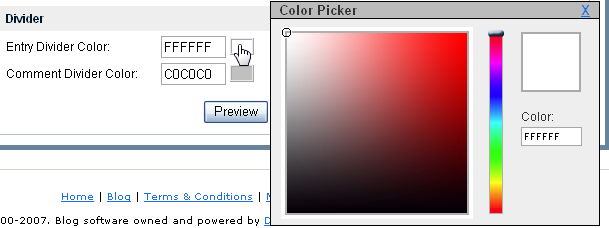
3. Divider The Entry Divider is the dividing line between entries.
|
![]() Click on the Save button when you are ready.
Click on the Save button when you are ready.
IX. Customizing Your Blog Sidebar
![]() Click on the Blog Customization tab.
Click on the Blog Customization tab.
![]() Click on the Sidebar sub-tab.
Click on the Sidebar sub-tab.
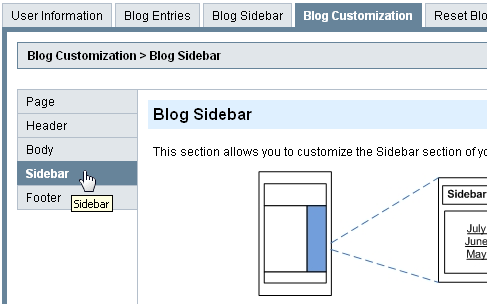
![]() This section allows you to customize the Sidebar section of your blog.
This section allows you to customize the Sidebar section of your blog.
Let's go through each setting together:
|
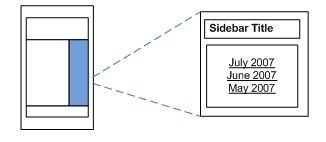
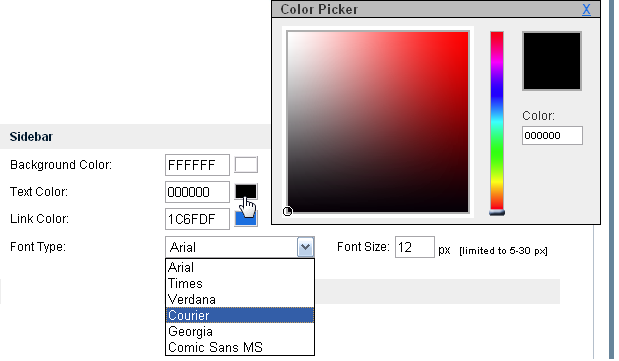
1. Sidebar Here, you can change the color of your blog's sidebar background, text and links, as well as text font type and size.
|
|
2. Sidebar Title Here, you can change the color of your blog's sidebar title's background, text and links, as well as text font type and size.
|
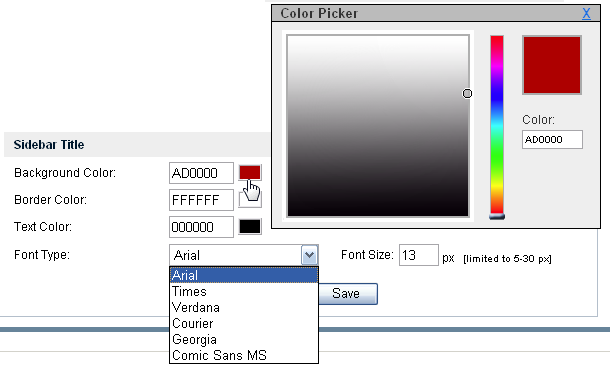
![]() Click on the Save button when you are ready.
Click on the Save button when you are ready.
X. Customizing Your Blog Footer
![]() Click on the Blog Customization tab.
Click on the Blog Customization tab.
![]() Click on the Footer sub-tab.
Click on the Footer sub-tab.
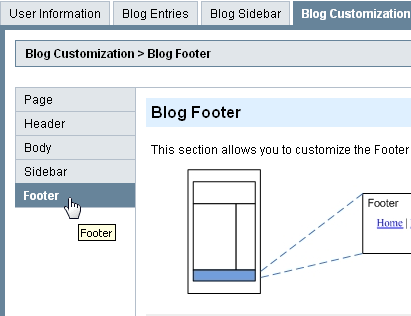
![]() This section allows you to customize the Footer section of your blog. You can change the color of your blog's sidebar background, text and links, as well as text font type and size.
This section allows you to customize the Footer section of your blog. You can change the color of your blog's sidebar background, text and links, as well as text font type and size.
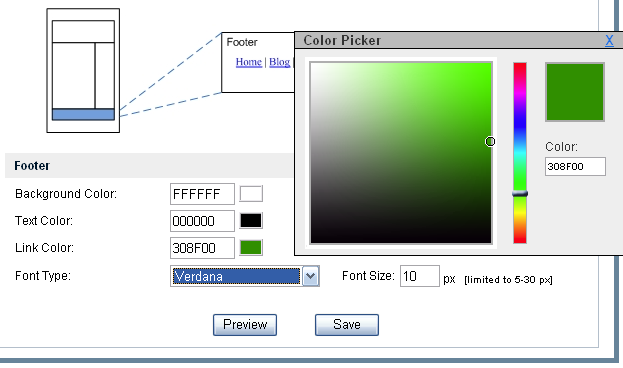
![]() Click on the Save button when you are ready.
Click on the Save button when you are ready.
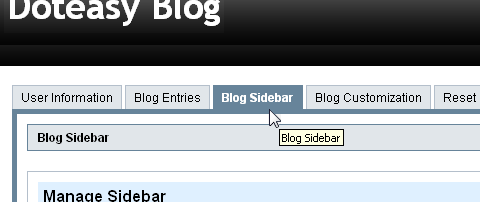
XI. Enabling and Disabling Sidebar Elements
![]() Click on the Blog Sidebar tab.
Click on the Blog Sidebar tab.
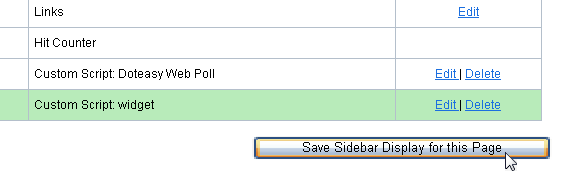
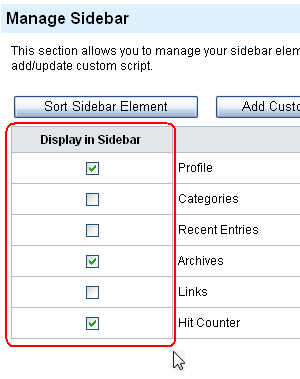
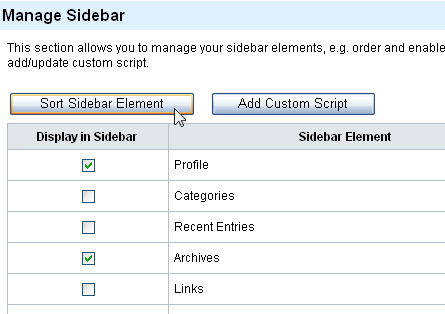
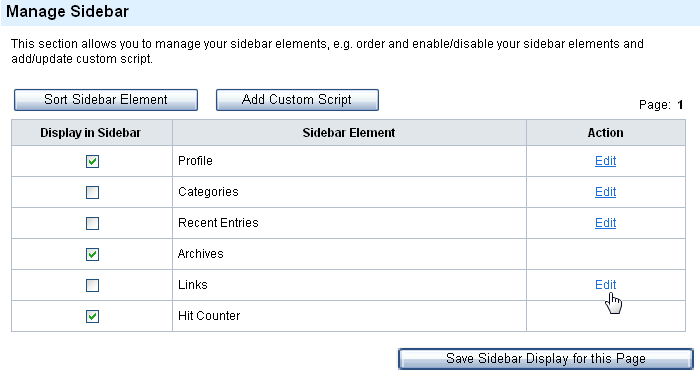
![]() Your Sidebar Elements are displayed in the table. Use the checkbox under the Display in Sidebar column to enable or disable the element.
Your Sidebar Elements are displayed in the table. Use the checkbox under the Display in Sidebar column to enable or disable the element.
![]() Check the box if you want to display the element on your blog's sidebar.
Check the box if you want to display the element on your blog's sidebar.
![]() Click on the Save Sidebar Display for this Page button when you are ready.
Click on the Save Sidebar Display for this Page button when you are ready.
XII. Edit Sidebar Elements
![]() Click on the Blog Sidebar tab.
Click on the Blog Sidebar tab.
![]() Your Sidebar Elements are displayed in the table. Use the Edit link under the Action column to edit the element.
Your Sidebar Elements are displayed in the table. Use the Edit link under the Action column to edit the element.
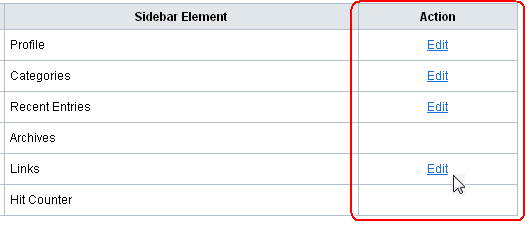
![]() Click on the Edit link to edit:
Click on the Edit link to edit:
- Profile - you will be redirected to the User Information tab
- Categories - you will be redirected to the Manage Categories page, where you can add and/or edit your category list
- Recent Entries - you will be redirected to the Manage Recent Entries page, where you can change the number of recent entries to be displayed on the sidebar
- Links - you will be redirected to the Manage Links page, where you can add and/or edit the links in your sidebar.
Note: The Profile, Categories, Recent Entries, Archives, Links, and Hit Counter are the default Doteasy Hosted Blog sidebar elements. They cannot be deleted. If you do not want to display any of these elements on your sidebar, simply disable it by unchecking the box next to it, under the Display in Sidebar column.
![]() Click on the Save Sidebar Display for this Page button when you are ready.
Click on the Save Sidebar Display for this Page button when you are ready.
XIII. Re-arrange Sidebar Elements
![]() Click on the Blog Sidebar tab.
Click on the Blog Sidebar tab.
![]() Your Sidebar Elements are displayed in the table. Click on the Sort Sidebar Element button to re-arrange the elements on your blog sidebar.
Your Sidebar Elements are displayed in the table. Click on the Sort Sidebar Element button to re-arrange the elements on your blog sidebar.
![]() Click on the element you want to re-arrange and use the Up and Down buttons to move the element up or down the list.
Click on the element you want to re-arrange and use the Up and Down buttons to move the element up or down the list.
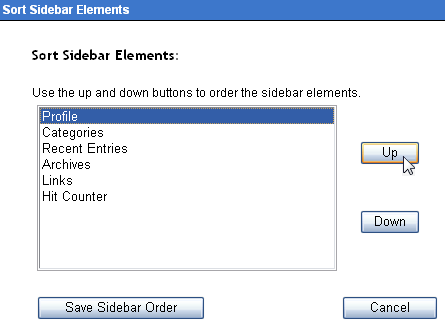
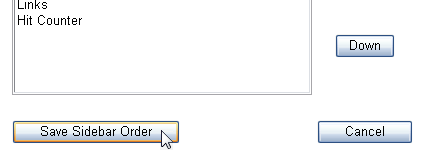
![]() Click on the Save Sidebar Order button when you are ready.
Click on the Save Sidebar Order button when you are ready.
XIV. Add a Custom Script
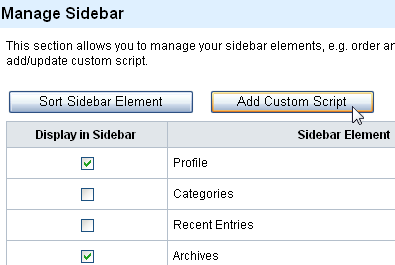
![]() Click on the Blog Sidebar tab.
Click on the Blog Sidebar tab.
![]() Click on the Add Custom Script button.
Click on the Add Custom Script button.
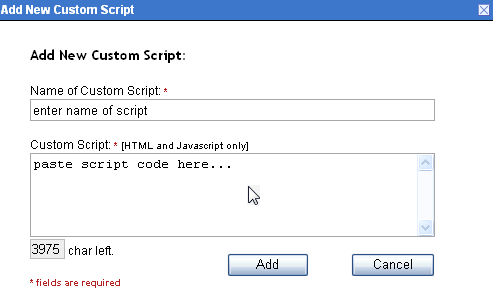
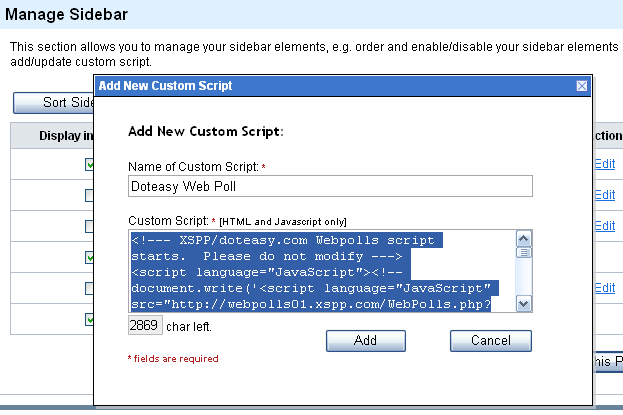
![]() Enter a name for the custom script. Then, paste the script into the Custom Script box.
Enter a name for the custom script. Then, paste the script into the Custom Script box.
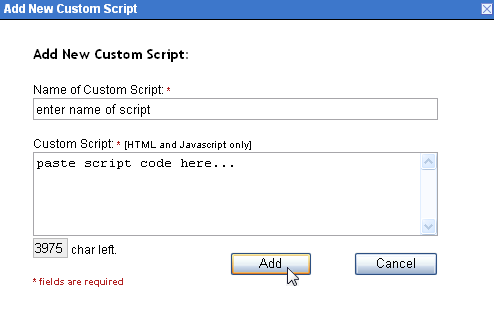
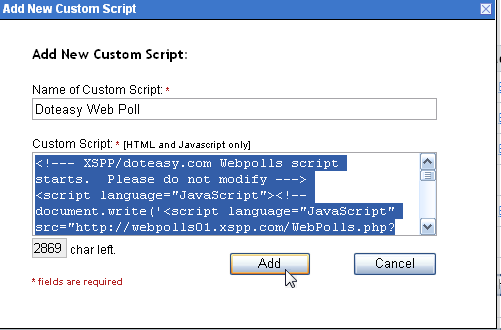
![]() Click on the Add button to add the script to your Sidebar Element list.
Click on the Add button to add the script to your Sidebar Element list.
XV. Creating a Category
Categories are keywords that associate with your entry. There are two ways to create a new category in your Doteasy Hosted Blog.
1. via a New Entry
![]() After you have composed your new entry, you will be asked to add the entry to a category. To create a new category, enter in the name of your new category into the Categories field.
After you have composed your new entry, you will be asked to add the entry to a category. To create a new category, enter in the name of your new category into the Categories field.
![]() You can click on the Save As Draft or the Save and Publish button. Either way, the new category will be created and added to your blog's category list.
You can click on the Save As Draft or the Save and Publish button. Either way, the new category will be created and added to your blog's category list.
2. via the Blog Sidebar tab
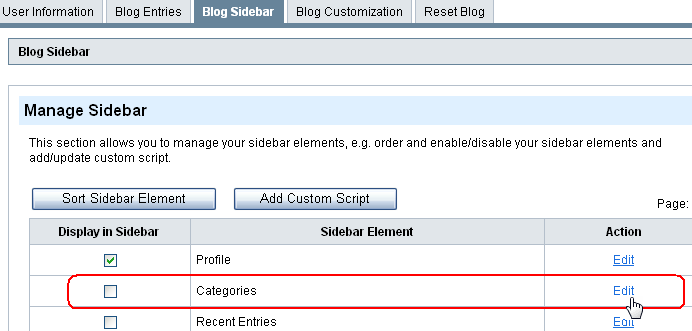
![]() Click on the Blog Sidebar tab.
Click on the Blog Sidebar tab.
![]() Click on the Edit link next to Categories.
Click on the Edit link next to Categories.
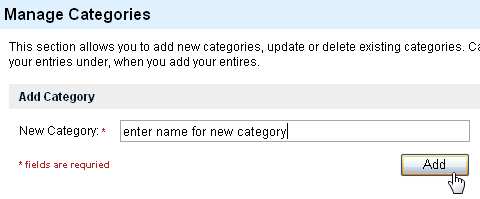
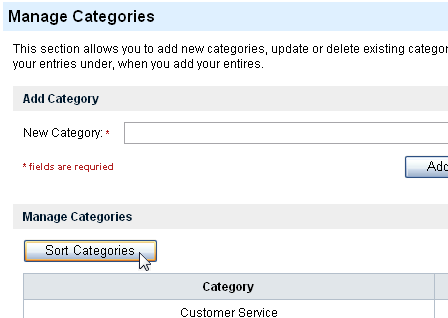
![]() On the Manage Categories page, you can add a new category by entering the new category name under Add Category. Click on the Add button to add the new category to your blog's category's list.
On the Manage Categories page, you can add a new category by entering the new category name under Add Category. Click on the Add button to add the new category to your blog's category's list.
XVI. Assign Multiple Categories to an Entry
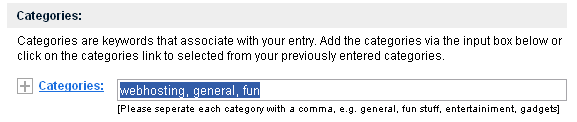
The Categories section is located on the bottom of the blog entry composition page.
![]() To assign an entry to a category, enter the category name in the input box, or click on the Categories link to select from your blog's categories list.
To assign an entry to a category, enter the category name in the input box, or click on the Categories link to select from your blog's categories list.

![]() To assign an entry to multiple categories, simply separate each category in the input box with a comma.
To assign an entry to multiple categories, simply separate each category in the input box with a comma.
![]() You can click on the Save As Draft or the Save and Publish button, depending if you want to save the entry as a draft or if you want to have it published.
You can click on the Save As Draft or the Save and Publish button, depending if you want to save the entry as a draft or if you want to have it published.
XVII. Edit a Category
![]() Click on the Blog Sidebar tab.
Click on the Blog Sidebar tab.
![]() Click on the Edit link next to Categories.
Click on the Edit link next to Categories.
![]() On the Manage Categories page, click on the Edit link next to the category you want to edit.
On the Manage Categories page, click on the Edit link next to the category you want to edit.
![]() Edit the category name as needed.
Edit the category name as needed.
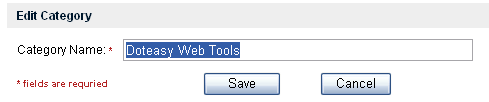
![]() Click on the Save button when finished.
Click on the Save button when finished.

XVIII. Re-arrange Categories
![]() Click on the Blog Sidebar tab.
Click on the Blog Sidebar tab.
![]() Click on the Edit link next to Categories.
Click on the Edit link next to Categories.
![]() On the Manage Categories page, click on the Sort Categories button.
On the Manage Categories page, click on the Sort Categories button.
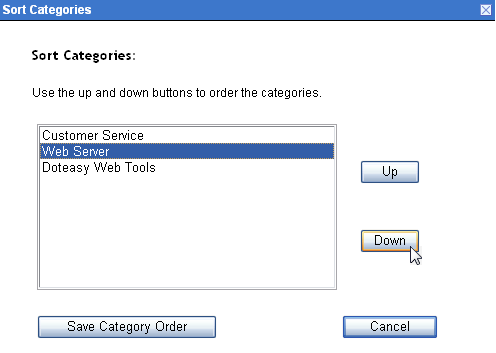
![]() On the Sort Categories page, highlight the category you need to rearrange. Use the Up and Down buttons to move the category up or down the category list.
On the Sort Categories page, highlight the category you need to rearrange. Use the Up and Down buttons to move the category up or down the category list.
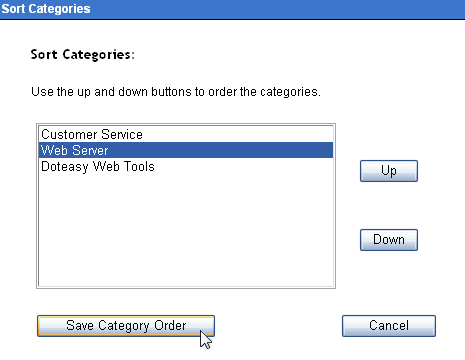
![]() Click on the Save Category Order button when finished.
Click on the Save Category Order button when finished.
XIX. Deleting a Category
![]() Click on the Blog Sidebar tab.
Click on the Blog Sidebar tab.
![]() Click on the Edit link next to Categories.
Click on the Edit link next to Categories.
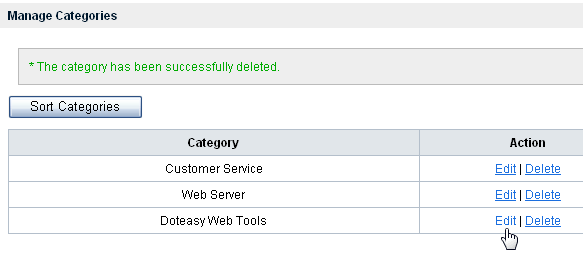
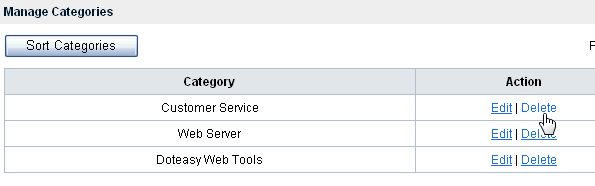
![]() On the Manage Categories page, click on the Delete link next to the category you want to delete.
On the Manage Categories page, click on the Delete link next to the category you want to delete.
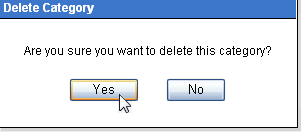
![]() On the Delete Category confirmation page, click on the Yes button.
On the Delete Category confirmation page, click on the Yes button.
![]() Note:
Note:
- Once a category has been deleted, it cannot be recovered or reversed. If the category was deleted by accident, you will need to re-create the category again via the Add Category steps.
- Deleting a category does not delete the entries or posts in that category. If an entry has been assigned to one category, the entry will be uncategorized upon the deletion of the category. If the entry has been assigned to multiple categories and only one of the categories is deleted, the entry will still be associated with the remaining categories.
XX. Adding a New Link
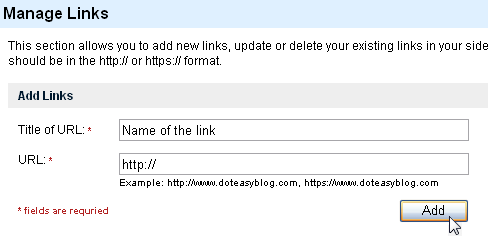
You can add links to sites that you visit often and share them with your visitors on your blog. Links are displayed on your blog sidebar. You can have up to 10 links, and they should be in the http://* or https://* format.
When you have a list of links to other blogs, it's called a "blogroll."
![]() Click on the Blog Sidebar tab.
Click on the Blog Sidebar tab.
![]() Click on the Edit link next to Links.
Click on the Edit link next to Links.
![]() On the Manage Links page, enter the title of the URL and the URL.
On the Manage Links page, enter the title of the URL and the URL.
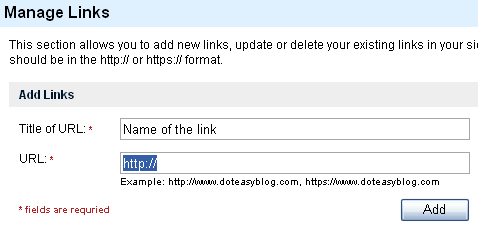
![]() Click on the Add button when you are ready. The new link will be added to your blog sidebar.
Click on the Add button when you are ready. The new link will be added to your blog sidebar.
XXI. Edit Links
![]() Click on the Blog Sidebar tab.
Click on the Blog Sidebar tab.
![]() Click on the Edit link next to Links.
Click on the Edit link next to Links.
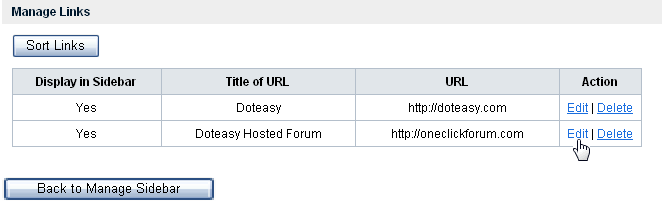
![]() On the Manage Links page, click on the Edit link next to the link you want to edit.
On the Manage Links page, click on the Edit link next to the link you want to edit.
![]() Edit the title and the URL of the link as needed.
Edit the title and the URL of the link as needed.
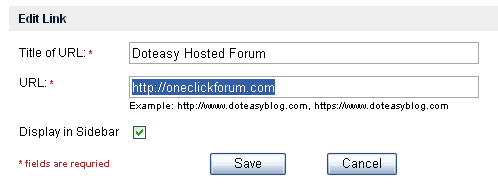
![]() Click on the Save button when you are ready.
Click on the Save button when you are ready.
XXII. Re-arrange Links
![]() Click on the Blog Sidebar tab.
Click on the Blog Sidebar tab.
![]() Click on the Edit link next to Links.
Click on the Edit link next to Links.
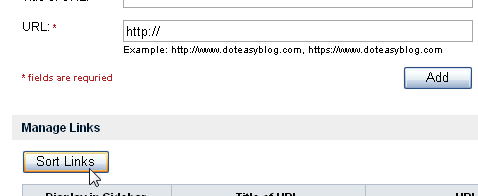
![]() On the Manage Links page, click on the Sort Links button.
On the Manage Links page, click on the Sort Links button.
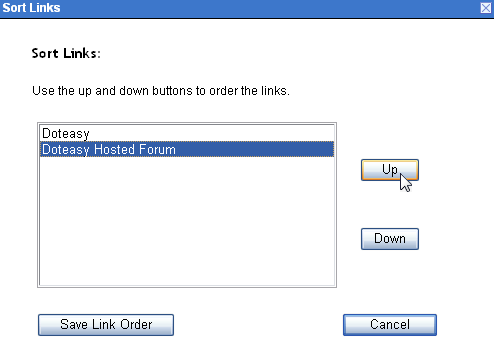
![]() On the Sort Links page, highlight the link you need to rearrange. Use the Up and Down buttons to move the link up or down the list.
On the Sort Links page, highlight the link you need to rearrange. Use the Up and Down buttons to move the link up or down the list.
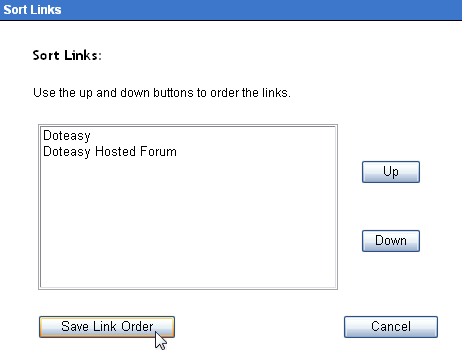
![]() Click on the Save Link Order button when finished.
Click on the Save Link Order button when finished.
XXIII. Posting a New Entry
A blog is all about posting entries. In your Doteasy Hosted Blog account, the Add Blog Entry page is where you compose your blog entry.
![]() Click on the Blog Entries tab. This will take you to the Add Blog Entry page.
Click on the Blog Entries tab. This will take you to the Add Blog Entry page.

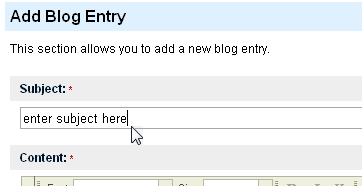
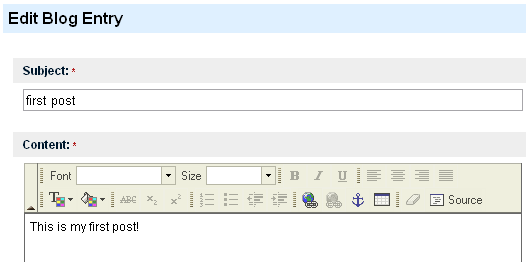
![]() First, enter the subject of your entry.
First, enter the subject of your entry.
![]() Then, enter the content of your entry in the textbox.
Then, enter the content of your entry in the textbox.
You can change the appearance of your entry using the provided tools and options.

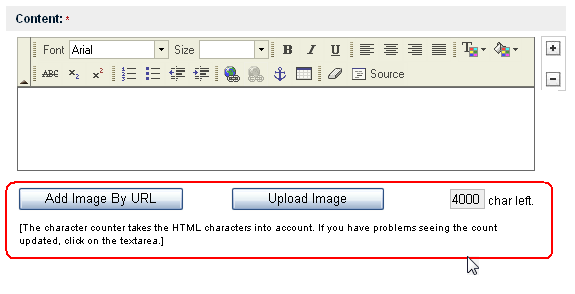
![]() You can use the Add Image By URL or the Upload Image buttons to attach an image to your entry.
You can use the Add Image By URL or the Upload Image buttons to attach an image to your entry.
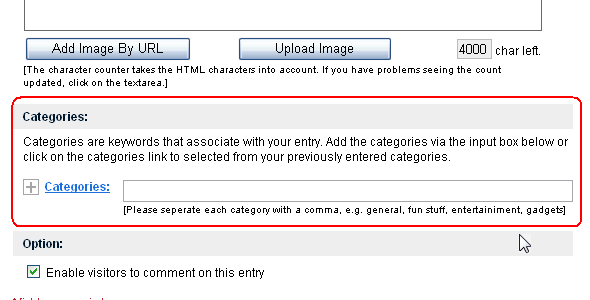
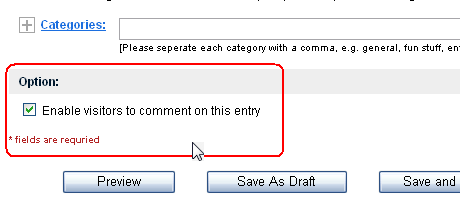
![]() If you want to assign the entry to a category, you can do so under the Categories section.
If you want to assign the entry to a category, you can do so under the Categories section.
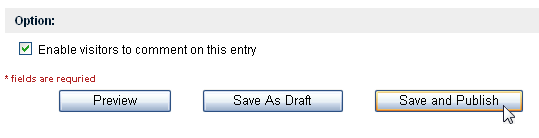
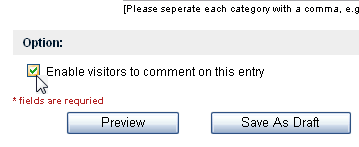
![]() If you want to allow visitors to comment on the entry, check the Enable visitors to comment on this entry box.
If you want to allow visitors to comment on the entry, check the Enable visitors to comment on this entry box.
![]() Click on the Save and Publish button when you are ready.
Click on the Save and Publish button when you are ready.
XXIV. Adding an Image
You can use the Image Utility to include images or photos on your posts.
![]() Click on the Add Image By URL or the Upload Image buttons. This will open up the Image Utility box.
Click on the Add Image By URL or the Upload Image buttons. This will open up the Image Utility box.
![]() If you want to add the image by URL, click on the Add Image By URL tab. Then, enter the URL and a description of the image.
If you want to add the image by URL, click on the Add Image By URL tab. Then, enter the URL and a description of the image.
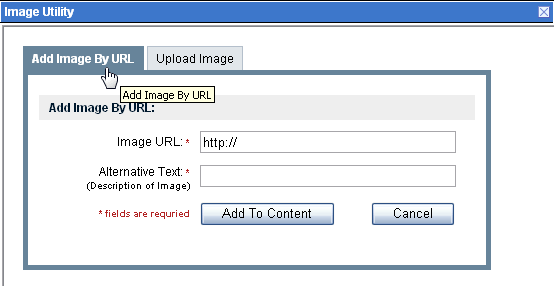
Click on the Add To Content button when you are ready.
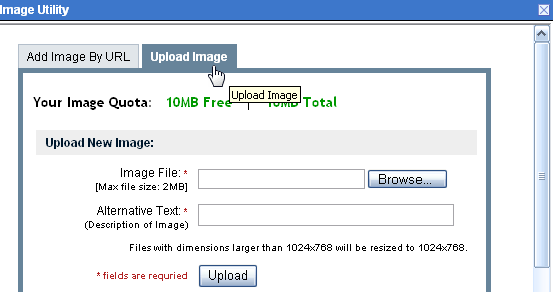
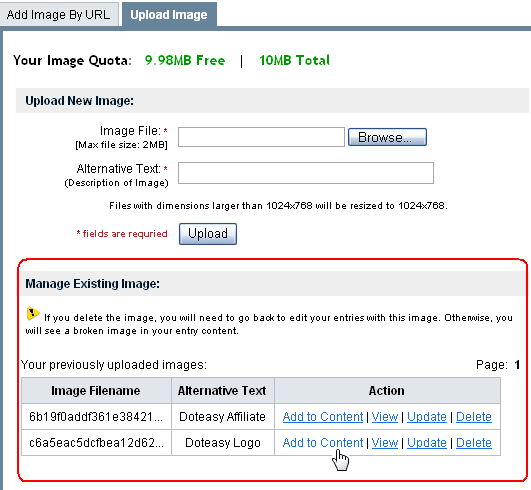
![]() If you want to upload the image to your account, click on the Upload Image tab.
If you want to upload the image to your account, click on the Upload Image tab.
Use the Browse button to locate the image file on your computer. Then, click on the Upload button to upload the file.
![]() Once you have uploaded the image, it will appear under the manage Existing Image section. Click on the Add to Content link to add the image to your post.
Once you have uploaded the image, it will appear under the manage Existing Image section. Click on the Add to Content link to add the image to your post.
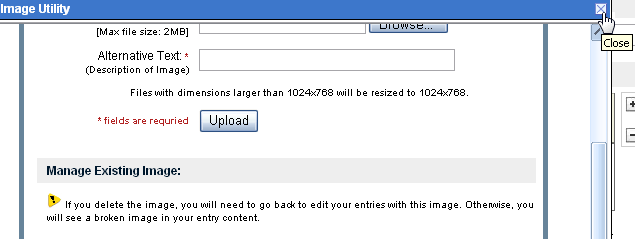
![]() Close the Image Utility window when you are finished.
Close the Image Utility window when you are finished.
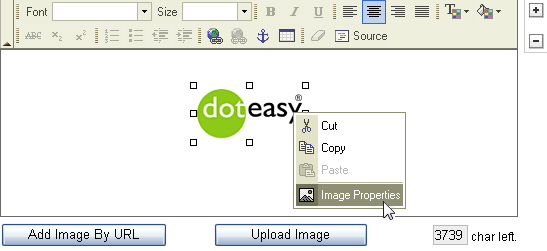
![]() If you need to alter the image in your post, simply right-click on your mouse for the Image Properties function.
If you need to alter the image in your post, simply right-click on your mouse for the Image Properties function.
![]() Here, you can change the width, height, border, spacing, and alignment of the image in your post.
Here, you can change the width, height, border, spacing, and alignment of the image in your post.
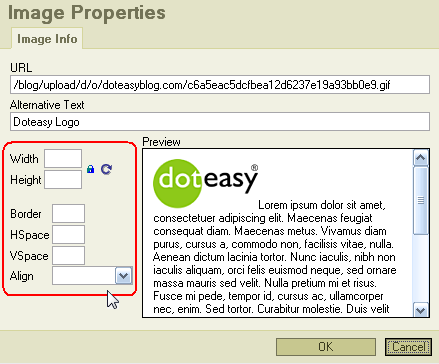
Click on the OK button when you are finished.
XXV. Uploading a File - Hyperlinking
You may wish to add a video, document or a non-image file to your post. One way of doing so is using hyperlinks.
With this method, you will be creating a link in your post to redirect the visitor to uploaded document, either for viewing or for downloading the file.
![]() Upload the file to your Doteasy FTP account.
Upload the file to your Doteasy FTP account.
Please visit our Online Tutorials for further FTP instructions and assistance.
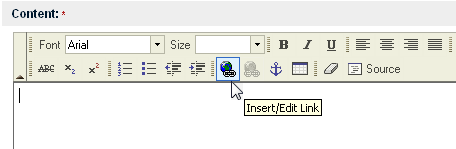
![]() Click on the hyperlink tool.
Click on the hyperlink tool.
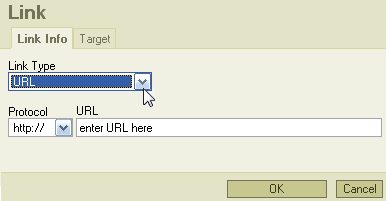
![]() Select the Link Type and enter in the link URL.
Select the Link Type and enter in the link URL.
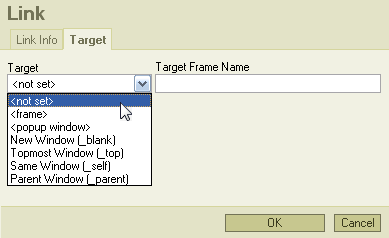
![]() Click on the Target tab to further define the link.
Click on the Target tab to further define the link.
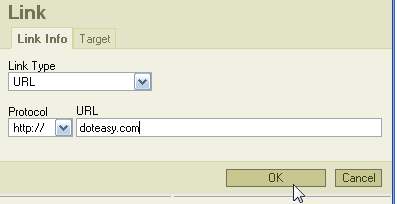
![]() Click on the OK button when you are ready.
Click on the OK button when you are ready.
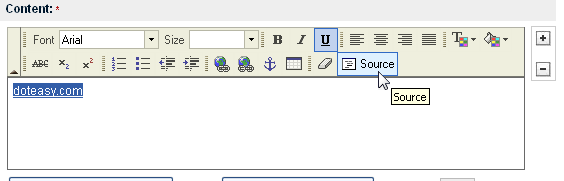
![]() The link will be added to the Content field. If you want to edit the link text, click on the Source tool.
The link will be added to the Content field. If you want to edit the link text, click on the Source tool.
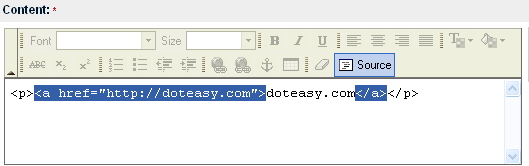
![]() The link text is the content between the <a href...> and the </a> tags.
The link text is the content between the <a href...> and the </a> tags.
![]() Click on the Source tool again when you are finished, this will bring you back to the Content rich-text window.
Click on the Source tool again when you are finished, this will bring you back to the Content rich-text window.

![]() Click on the Save and Publish button when you are ready to publish your post.
Click on the Save and Publish button when you are ready to publish your post.
XXV. Uploading a File - Embedding an Object
You may wish to add an audio, video, or a non-image file to your post using <object> and <embed> tags.
<embed...> tags puts a browser plugin in your blog content. A plugin is a special program located on your visitor's computer that handles its own special type of data file. The most common plugins are for sounds and movies. The <embed...> tag gives the location of a data file that the plugin should handle. This means, when a visitor views the post, their browser will play the uploaded file using the appropriate plugin.
For more information on the <object> tag, please visit W3Schools.com.
![]() Upload the file to your Doteasy FTP account.
Upload the file to your Doteasy FTP account.
Please visit our Online Tutorials for further FTP instructions and assistance.
You can skip this step if the audio or video file that you want to add to your post is already on the Internet (ie. on YouTube or other multimedia-sharing sites).
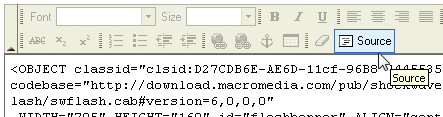
![]() Click on the Source tool.
Click on the Source tool.

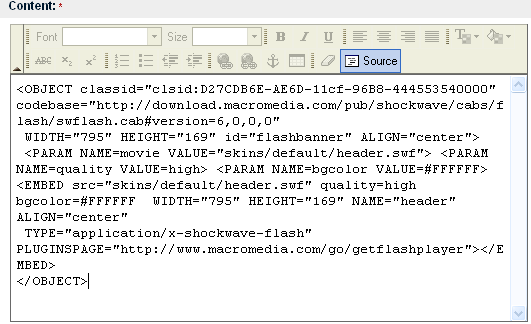
![]() Enter in your <object> and <embed> tags. Make sure your codes are correct.
Enter in your <object> and <embed> tags. Make sure your codes are correct.
- Example: The flash banner on our Doteasy Scripts and Tools Library. If you want to add the flash banner to your post, you will need to enter the following code:
![]() Click on the Source tool again when you are finished, this will bring you back to the Content rich-text window.
Click on the Source tool again when you are finished, this will bring you back to the Content rich-text window.
![]() Click on the Save and Publish button when you are ready to publish your post.
Click on the Save and Publish button when you are ready to publish your post.
XXVI. Edit a Saved Draft
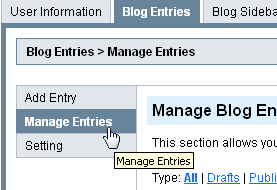
![]() Click on the Blog Entries tab.
Click on the Blog Entries tab.
![]() Click on the Manage Entries sub-tab.
Click on the Manage Entries sub-tab.
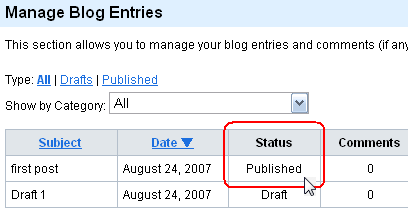
![]() Your drafts will be labelled Draft under the Status column.
Your drafts will be labelled Draft under the Status column.
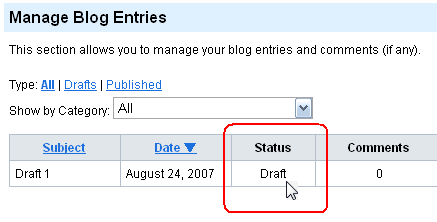
Alternatively, click on the Drafts link to display all your drafts-only posts.
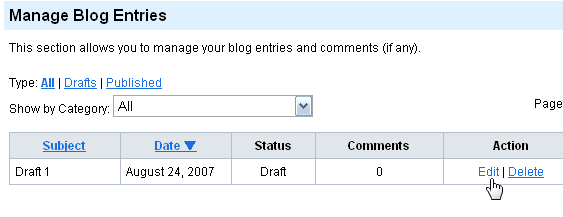
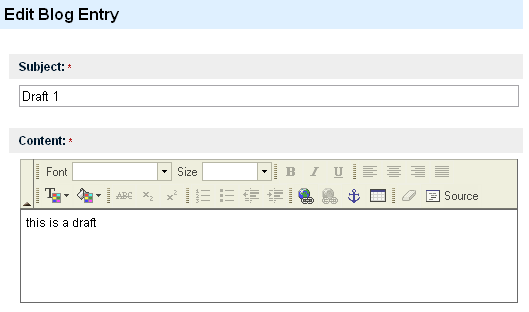
![]() Click on the Edit link next to the draft you want to edit.
Click on the Edit link next to the draft you want to edit.
![]() Edit the draft.
Edit the draft.
![]() Click on the Save and Publish button when you are ready to publish your post.
Click on the Save and Publish button when you are ready to publish your post.
XXVII. Edit a Published Entry
![]() Click on the Blog Entries tab.
Click on the Blog Entries tab.
![]() Click on the Manage Entries sub-tab.
Click on the Manage Entries sub-tab.
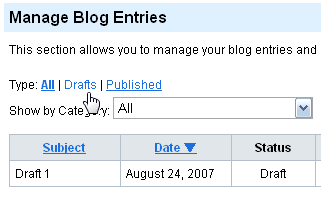
![]() Published entries will be labelled Published under the Status column.
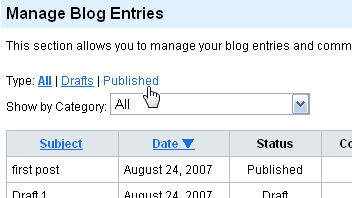
Published entries will be labelled Published under the Status column.
Alternatively, click on the Published link to display all your published posts.
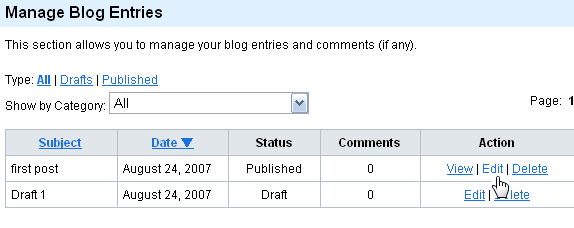
![]() Click on the Edit link next to the entry you want to edit.
Click on the Edit link next to the entry you want to edit.
![]() Edit the draft.
Edit the draft.
![]() Click on the Save and Publish button when you are ready to republish your post.
Click on the Save and Publish button when you are ready to republish your post.
XXVIII. Delete a Published Entry
![]() Click on the Blog Entries tab.
Click on the Blog Entries tab.
![]() Click on the Manage Entries sub-tab.
Click on the Manage Entries sub-tab.
![]() Published entries will be labelled Published under the Status column.
Published entries will be labelled Published under the Status column.
Alternatively, click on the Published link to display all your published posts.
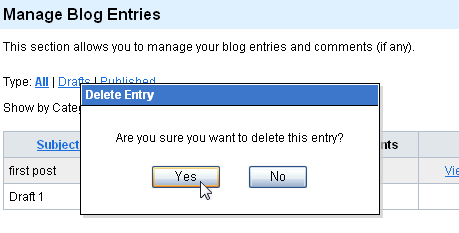
![]() Click on the Delete link next to the entry you want to delete.
Click on the Delete link next to the entry you want to delete.

![]() Click on the Yes button to confirm entry deletion.
Click on the Yes button to confirm entry deletion.
XXIX. Changing Blog Entries Display Settings
You can change how entries are displayed on your blog's main page.
![]() Click on the Blog Entries tab.
Click on the Blog Entries tab.
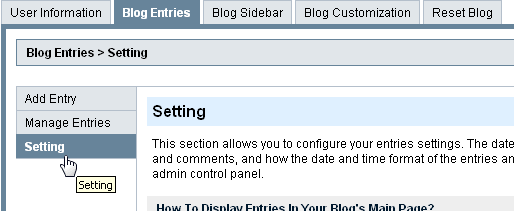
![]() Click on the Setting sub-tab.
Click on the Setting sub-tab.
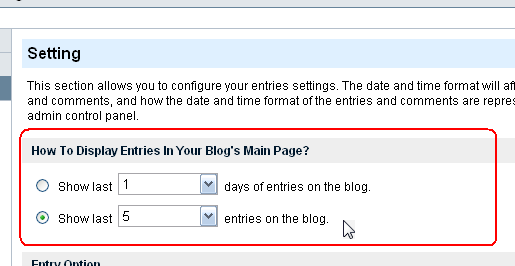
![]() Under the How to Display Entries in your Blog's Main Page? section, choose between displaying entries based on day or number.
Under the How to Display Entries in your Blog's Main Page? section, choose between displaying entries based on day or number.
![]() Click on the Save button when you are finished.
Click on the Save button when you are finished.
Note: The How to Display Entries in your Blog's Main Page? section is for specifying the number of entries is to be display in the blog's main page in total. It does not mean the pagination per page. The blog's main page only displays 5 entries at a time. If you have 10 entries for display, you have 2 pages and see the pagination.
XXX. "Email to Friend"
You can include a "Email to Friend" link on your entry. The link allows your visitor to email your entry to their friends.
![]() Click on the Blog Entries tab.
Click on the Blog Entries tab.
![]() Click on the Setting sub-tab.
Click on the Setting sub-tab.
![]() Under the Entry Option section, check the Enable "Email To Friend" link box.
Under the Entry Option section, check the Enable "Email To Friend" link box.

![]() Click on the Save button when you are finished.
Click on the Save button when you are finished.
XXXI. Changing the Date and Time Format
You can change the date and time settings on your blog entries. The date and time format will affect both entries and comments, and how the date and time format of the entries and comments are represented in your admin control panel.
![]() Click on the Blog Entries tab.
Click on the Blog Entries tab.
![]() Click on the Setting sub-tab.
Click on the Setting sub-tab.
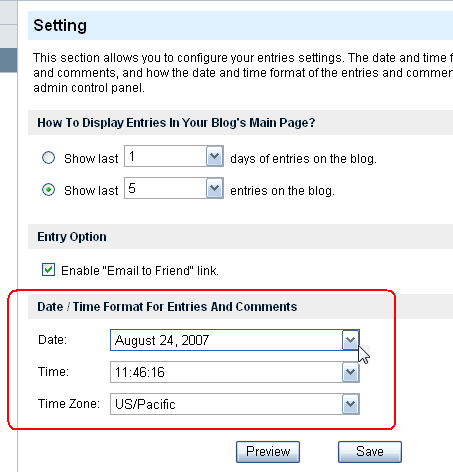
![]() Under the Date / Time Format For Entries And Comments section, select our display preferences using the drop-down menus.
Under the Date / Time Format For Entries And Comments section, select our display preferences using the drop-down menus.
![]() Click on the Save button when you are finished.
Click on the Save button when you are finished.
XXXII. Enabling an Entry for Comment
In Doteasy Hosted Blog, you have the option to allow your viewers to leave comments on your blog entries. You can delete any comments you don't like. This feature allows an interaction between your and your viewer, while giving you complete control over the comments and feedbacks.
You will find the option on the bottom of the entry composition page, whether you are creating a new entry or editing a draft/published entry.

![]() Check the Enable visitors to comment on this entry box.
Check the Enable visitors to comment on this entry box.
![]() Click on the Save and Publish button when you are ready.
Click on the Save and Publish button when you are ready.
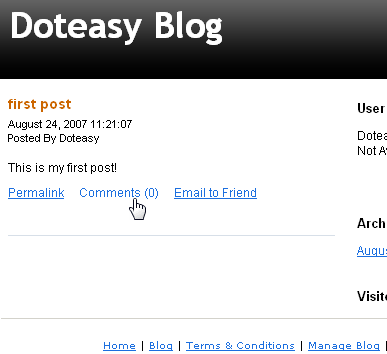
![]() You will see the Comments link attached to your entry on your blog.
You will see the Comments link attached to your entry on your blog.
XXXIII. Managing Comments
Doteasy Hosted Blog gives you full control over the comments and feedbacks your visitors leave on your blog. You can manage these comments via the Manage Blog Entries page.
![]() Click on the Blog Entries tab.
Click on the Blog Entries tab.
![]() Click on the Manage Entries sub-tab.
Click on the Manage Entries sub-tab.
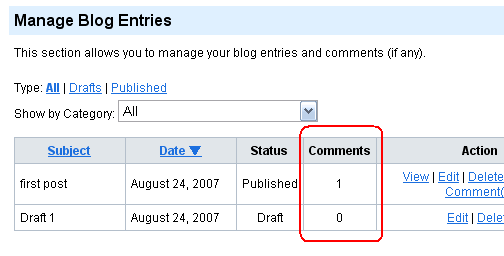
![]() If there is a comment on any entry, it will be indicated in the Comments column.
If there is a comment on any entry, it will be indicated in the Comments column.
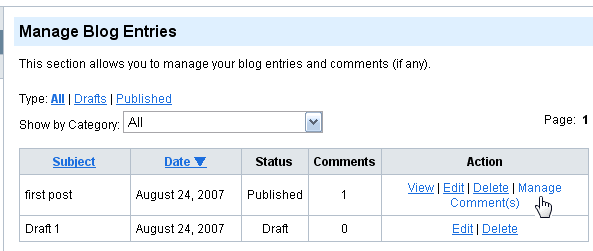
![]() Click on the Manage Comment(s) link next to the entry which comments you want to manage.
Click on the Manage Comment(s) link next to the entry which comments you want to manage.
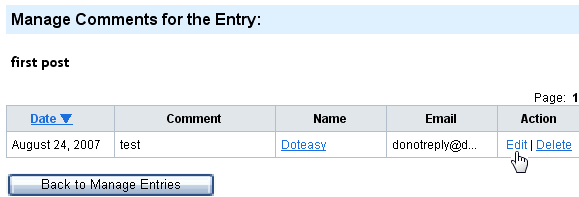
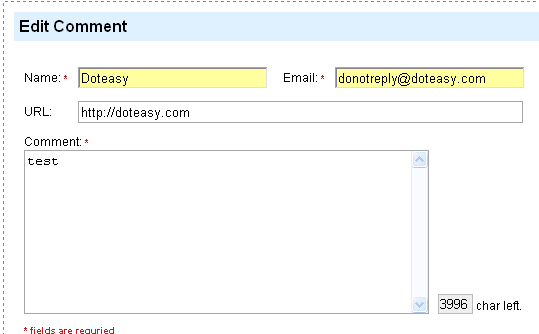
![]() All comments for that entry will be listed on the Manage Comments for the Entry page. Click on the Edit link next to the comment you want to edit.
All comments for that entry will be listed on the Manage Comments for the Entry page. Click on the Edit link next to the comment you want to edit.
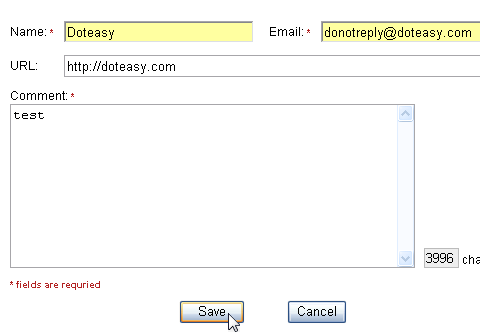
![]() Edit the comment as needed. All fields can be edited.
Edit the comment as needed. All fields can be edited.
![]() Click on the Save button when you are finished.
Click on the Save button when you are finished.
XXXIV. Deleting Comments
Doteasy Hosted Blog gives you full control over the comments and feedbacks your visitors leave on your blog. You can delete any comment you do not wish to display on your blog.
![]() Click on the Blog Entries tab.
Click on the Blog Entries tab.
![]() Click on the Manage Entries sub-tab.
Click on the Manage Entries sub-tab.
![]() If there is a comment on any entry, it will be indicated in the Comments column.
If there is a comment on any entry, it will be indicated in the Comments column.
![]() Click on the Manage Comment(s) link next to the entry which comments you want to manage.
Click on the Manage Comment(s) link next to the entry which comments you want to manage.
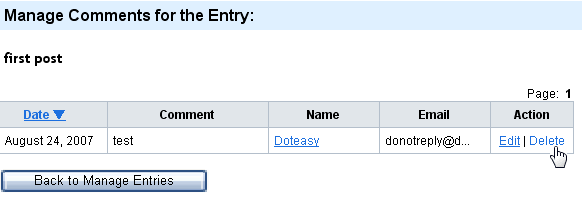
![]() All comments for that entry will be listed on the Manage Comments for the Entry page. Click on the Delete link next to the comment you want to delete.
All comments for that entry will be listed on the Manage Comments for the Entry page. Click on the Delete link next to the comment you want to delete.
![]() Click on the Yes button to delete the comment.
Click on the Yes button to delete the comment.
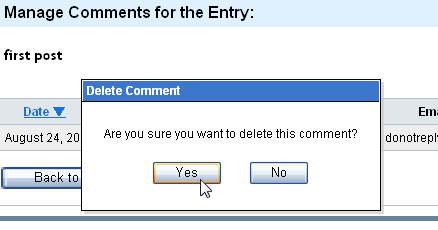
![]() The comment will be deleted from your blog.
The comment will be deleted from your blog.
XXXV. Adding Doteasy Web Tools to your Blog Sidebar
YES, you can add Doteasy Web Tools to your Doteasy Hosted Blog.
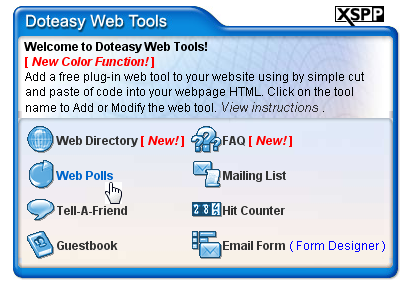
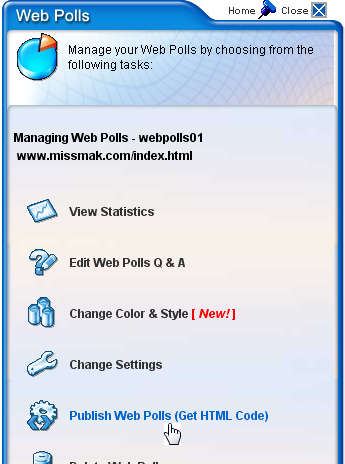
![]() Login to your Doteasy Member Zone to obtain the HTML code for the Doteasy Web Tool you want to add.
Login to your Doteasy Member Zone to obtain the HTML code for the Doteasy Web Tool you want to add.
![]() On your Doteasy Hosted Blog account, click on the Blog Sidebar tab.
On your Doteasy Hosted Blog account, click on the Blog Sidebar tab.
![]() Click on the Add Custom Script button.
Click on the Add Custom Script button.
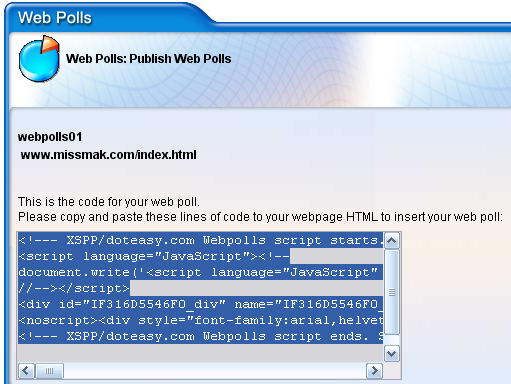
![]() Enter the name of the Doteasy Web Tool. Then, copy and paste the Doteasy Web Tool's HTML code into the Custom Script box.
Enter the name of the Doteasy Web Tool. Then, copy and paste the Doteasy Web Tool's HTML code into the Custom Script box.
![]() Click on the Add button when you are finished.
Click on the Add button when you are finished.
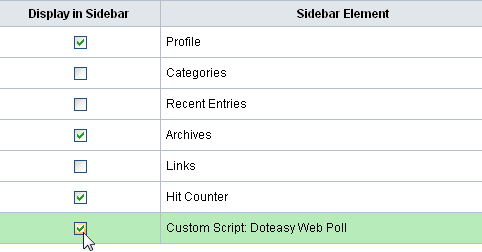
![]() By default, upon adding a new script, the Display in Sidebar box will be checked.
By default, upon adding a new script, the Display in Sidebar box will be checked.
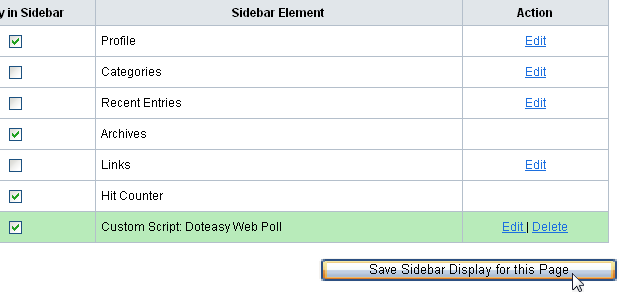
![]() Click on the Save Sidebar Display for this Page button when you are finished.
Click on the Save Sidebar Display for this Page button when you are finished.
XXXVI. Adding Widgets to your Blog Sidebar
A widget is a portable code that can be installed on your blog. A widget can be an application, gadget, badge, module, capsule, or banner, etc. A widget adds dynamic content to your blog.
Common widgets that bloggers add to their blog include:
- ads
- news feed reader
- image viewer
- search engine searchbox
- multimedia player
- games
- club or group batches
- and more...
You can also add a Doteasy plugin to your blog sidebar:
- Doteasy Web Tool
- Doteasy Email Signin Box
- Doteasy Affiliate Account banner
![]() Click on the Blog Sidebar tab.
Click on the Blog Sidebar tab.
![]() Click on the Add Custom Script button.
Click on the Add Custom Script button.
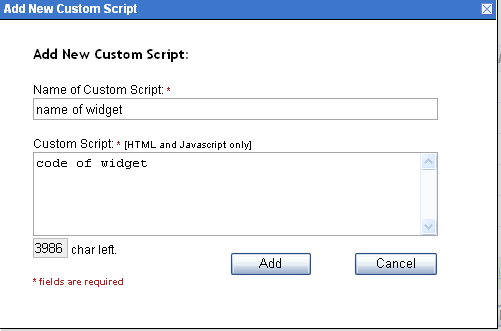
![]() Enter the name of widget. Then, copy and paste the widget's HTML or Javascript code into the Custom Script box.
Enter the name of widget. Then, copy and paste the widget's HTML or Javascript code into the Custom Script box.
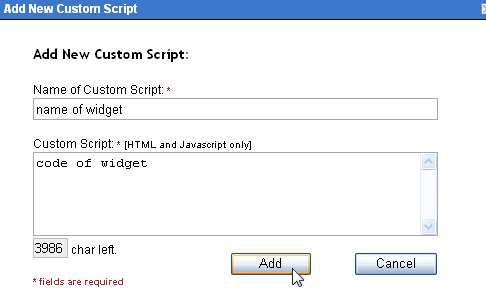
![]() Click on the Add button when you are finished.
Click on the Add button when you are finished.
![]() Check the Display in Sidebar box to display the widget on your blog sidebar.
Check the Display in Sidebar box to display the widget on your blog sidebar.
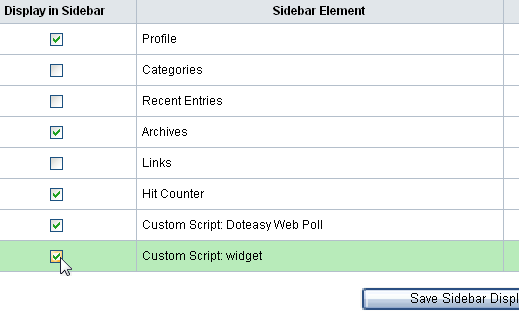
![]() By default, upon adding a new script, the Display in Sidebar box will be checked.
By default, upon adding a new script, the Display in Sidebar box will be checked.